

close
Choose Your Site
Global
Social Media

Author: Site Editor Publish Time: 2026-01-29 Origin: Site

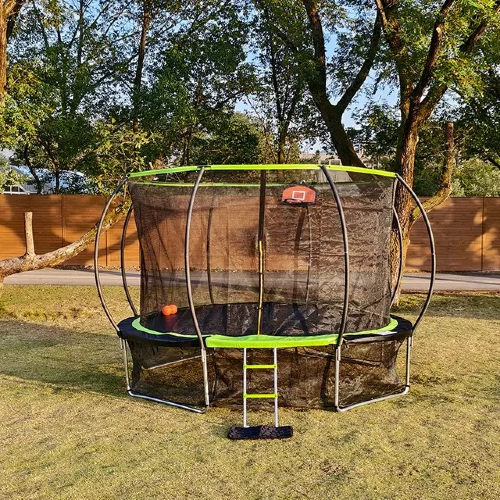
Choosing the right trampoline for your family can be a daunting task. Among the many options available in the market, Pumpkin Trampoline stands out as an excellent choice for parents seeking both safety and fun for their children. With its unique design and superior quality, this trampoline ensures a fun and safe experience while helping children improve their coordination, balance, and overall fitness.
In this guide, we will walk you through the steps of assembling your Pumpkin Trampoline. This blog will not only explain the process but also provide safety tips, maintenance advice, and solutions to common issues faced during assembly. By the end of this guide, you will be fully prepared to enjoy a hassle-free and safe trampoline experience.
Before starting the assembly, it’s important to carefully unbox your Pumpkin Trampoline and check all the parts. This initial step ensures that everything you need is included and in good condition. Here’s how to do it:
Open the Box Carefully
Gently open the package, avoiding any sharp objects that may damage the contents inside. Lay out all the parts in a clear, spacious area so you can easily access them during the assembly process. Make sure you have the trampoline frame, safety net, jumping mat, legs, springs, and any other accessories that come with the package.
Check the Parts List
Compare the parts you’ve unboxed with the list provided in the manual. This step is essential to ensure that nothing is missing or damaged during shipping. If anything seems out of place, contact customer support before proceeding with the assembly to avoid delays or issues later on.
Choose a Suitable Assembly Location
Selecting the right place to assemble your Pumpkin Trampoline is crucial for safety and convenience. Ensure the ground is flat, soft, and free of debris, as an uneven or rocky surface can cause damage to the trampoline. Ideally, place it on a grassy area to prevent scratches or damage to the frame.
Required Tools
Most of the tools needed for assembly are included, but you may need a wrench or socket set for tightening bolts, safety gloves to protect your hands, and a soft mallet to help with fitting the parts together securely.
The frame is the core of your Pumpkin Trampoline. Start by connecting the main frame pieces. This step is critical because the stability of the trampoline relies on the quality of the frame assembly.
Frame Parts
The frame consists of several sections that need to be joined together. Use the bolts and nuts provided in the package.
Assembling the Frame
Begin with connecting two larger frame pieces, and progressively attach the remaining parts. Tighten the nuts securely but avoid overtightening, as this could cause damage to the frame.
The legs provide support and stability to the trampoline. They need to be securely attached to the frame.
Identifying Leg Pieces
You will find four or more legs, depending on the trampoline model. Each leg piece should be attached to the frame using the provided screws.
Securing the Legs
Use a wrench or socket set to tighten the screws, ensuring that the trampoline stands firmly on all four legs. This step is crucial for preventing wobbling or instability.
The jumping mat is the heart of your Pumpkin Trampoline, where your kids will jump. Installing it correctly is essential for both safety and functionality.
Aligning the Mat
Lay the jumping mat out on the ground and ensure it is aligned with the frame. The mat should have evenly distributed holes for the springs.
Attaching the Springs
Start attaching the springs at the four corners of the trampoline frame. Use the spring tool (often included in the kit) to hook the springs into place. Then, gradually work your way around the frame, attaching the remaining springs evenly.
Ensuring Proper Tension
Ensure that the springs are evenly stretched to avoid any imbalances during use. The jumping mat should have a slight tension but not be overstretched.
The safety net is one of the most important features of the Pumpkin Trampoline, keeping children safe from falling off while jumping.
Attaching the Safety Net Poles
Insert the poles for the safety net into the designated slots. Ensure each pole is positioned securely and evenly spaced around the trampoline.
Mounting the Net
Carefully attach the net to the poles using the provided fasteners. Make sure the net is tightly secured and does not have any gaps.
Before allowing children to use the trampoline, perform a final check to ensure everything is securely assembled.
Check Frame Stability
Shake the trampoline gently to ensure it is steady. If you notice any wobbling, go back and check the leg attachments.
Inspect Springs and Net
Double-check the springs, mat, and safety net to ensure they are tightly secured.
Test the Trampoline
Perform a gentle bounce test to ensure the mat is firm and stable. If there is any slack, adjust the springs accordingly.
Safety is paramount when it comes to using your Pumpkin Trampoline. Here are a few tips to ensure the safest possible experience for your children:
Supervision is Key
Always supervise children while they are using the trampoline. Ensure they understand basic safety rules, such as not jumping together and avoiding flips.
Check Weight Limits
Make sure the trampoline is not overloaded. Typically, Pumpkin Trampoline can support multiple users, but it is important to adhere to the manufacturer’s weight recommendations.
Wear Proper Footwear
Children should jump barefoot or with trampoline-specific socks for better grip. Avoid shoes with hard soles, as they can damage the mat.
Regular Inspections
Periodically inspect the trampoline for any wear and tear, especially the springs and safety net. Replace any damaged parts immediately.
Sometimes things may not go as planned during assembly. Here are some common issues and their solutions:
Problem | Solution |
The trampoline is wobbling | Ensure the legs are securely attached and that the ground is level. If necessary, adjust the frame connections. |
Springs are too loose or too tight | Adjust the tension of the springs by either loosening or tightening them until the jumping mat has the right amount of stretch. |
The safety net doesn’t fit properly | Re-check the pole placement and ensure the net is securely fastened around the poles. |
Jumping mat is uneven | Check if the springs are evenly stretched. If some are tighter than others, re-adjust the springs. |
To extend the life of your Pumpkin Trampoline, regular maintenance is essential. Here’s how you can care for it:
Cleaning the Trampoline
Clean the trampoline regularly using a soft cloth or brush. Avoid using harsh chemicals or abrasive materials that could damage the surface of the mat or net.
Storing the Trampoline
If you live in an area with harsh winters, it’s best to disassemble the trampoline and store it indoors. If that’s not possible, cover the trampoline with a waterproof tarp to protect it from the elements.
Spring Care
Keep the springs lubricated using silicone-based lubricants to prevent rust and ensure smooth operation.
Net and Mat Protection
During off-seasons, store the safety net and jumping mat in a dry, cool place to prevent any mildew or mold buildup.
Assembling and maintaining your Pumpkin Trampoline might seem like a challenge initially, but with our comprehensive guide, we’ve simplified the process for you. Safety is always our top priority, so be sure to inspect the trampoline before each use and supervise children while they’re enjoying their time jumping.
By following the clear instructions we’ve provided, you can quickly and easily set up your Pumpkin Trampoline, ensuring hours of fun and fitness for your family. Regular maintenance is essential to keep your trampoline in great condition, so don't forget to care for it to ensure longevity.
If you have any further questions or need assistance, we encourage you to reach out to us at Zhejiang Zoshine Sports Equipment Co., Ltd.. Our team is always ready to help you with expert advice, support, or to provide more information about our products. Enjoy your trampoline experience with peace of mind, knowing you’re supported by a trusted brand!
Q: How long does it take to assemble the Pumpkin Trampoline?
A: It typically takes 30-60 minutes to assemble the Pumpkin Trampoline, depending on your experience and help available.
Q: Can I leave the trampoline outdoors all year round?
A: It is best to cover the trampoline during harsh weather or disassemble it for storage to prolong its life.
Q: What’s the weight limit for the Pumpkin Trampoline?
A: The Pumpkin Trampoline can support up to 250 lbs of weight at once, but it is recommended for children and light adults.
Q: How do I know if my trampoline springs need to be replaced?
A: If the springs appear stretched out or broken, it’s time to replace them. Regularly inspect the springs for wear and tear.


