

close
Choose Your Site
Global
Social Media

Author: Site Editor Publish Time: 2026-09-27 Origin: Site
While a standard bounce session provides a highly effective cardiovascular workout, adding a handlebar fundamentally changes your biomechanics. You step onto the mat, grip the bar, and immediately alter how your body absorbs impact.
Buyers often treat this accessory as a simple afterthought during their purchase. However, mismatching the bar to your height or workout style leads to poor posture, diminished core engagement, and potential safety risks. You might strain your back or destabilize the frame without realizing why.
We provide a clear framework for evaluating how this specific adjustment impacts workout intensity, joint safety, and stability. You will learn how to properly measure yourself, select the right frame style, and choose a suitable fitness trampoline with handle for your specific training requirements.
Handlebar height dictates your center of gravity; waist-high positioning maximizes core engagement while minimizing knee strain.
Adjustable handles offer versatility for multi-user households but often introduce mechanical wobble if locking mechanisms are poorly designed.
Leaning heavily on a handlebar that is set too high diminishes caloric burn and disrupts the low-impact suspension benefits of the trampoline mat.
Decision logic should prioritize base stability and secure locking pins over maximum height range.
Gripping a handle directly shifts your body’s weight distribution during a workout. A properly positioned bar keeps your center of gravity directly over the jumping mat. You remain balanced, grounded, and stable. Conversely, an improperly positioned grip forces you to lean backward or hunch forward. This breaks your vertical alignment instantly. Your core engagement depends entirely on maintaining this strict upright alignment. The optimal height encourages a slight hip hinge during the bounce. This specific stance forces your core and lower body musculature to absorb the kinetic energy naturally.
If the bar sits too high, users tend to "hang" their upper body weight on it. Hanging offloads your body weight from your legs. This drastically reduces the overall cardiovascular efficiency of your exercise trampoline. You burn fewer calories because large leg muscles disengage. If the bar sits too low, it forces a compromised, rounded-back posture. A rounded thoracic and lumbar spine significantly increases disc stress during rapid, repetitive movements.
We must also evaluate long-term joint health. Many individuals evaluate rebounders specifically for bad knees or injury rehabilitation. For these users, handlebar placement dictates downward force distribution. Proper handlebar height distributes peak impact forces away from the knee joint during rapid deceleration. Your glutes and hamstrings do the heavy lifting. This protects vulnerable connective tissues like the meniscus and anterior cruciate ligament from sheer stress.
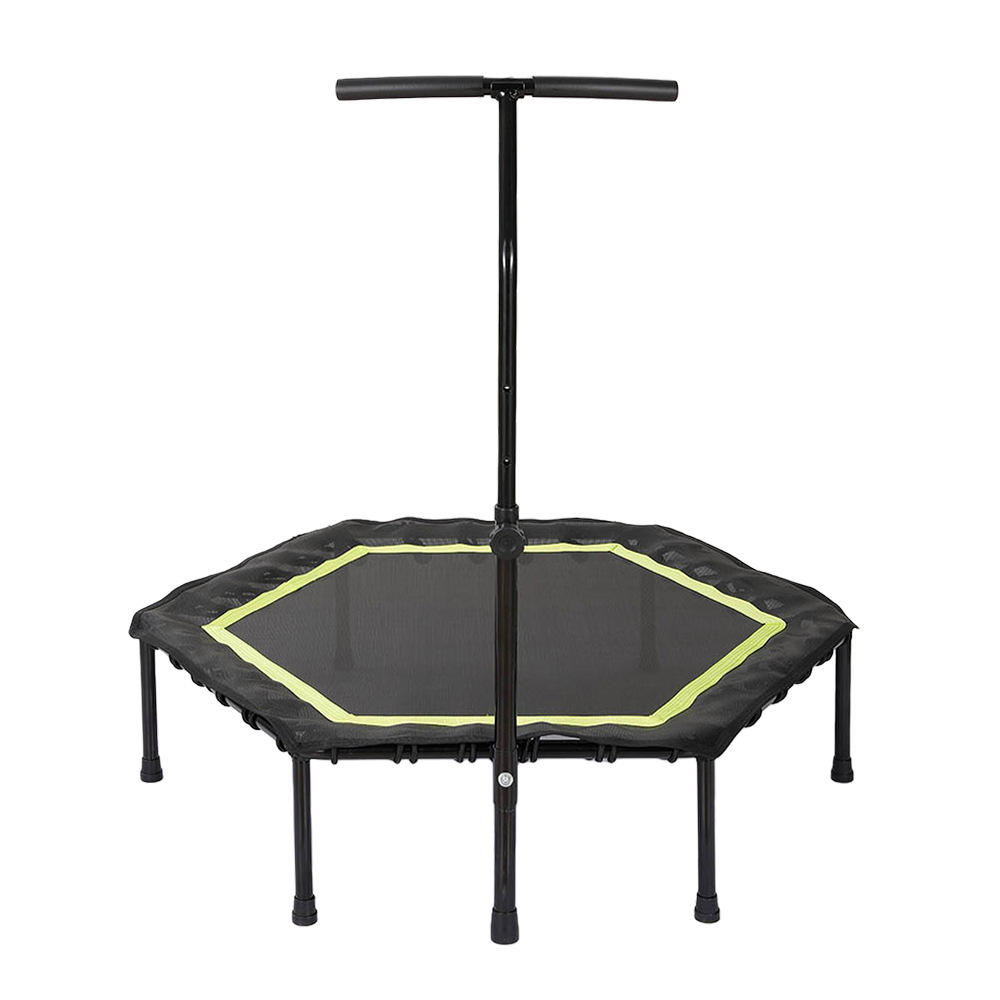
Manufacturers typically offer two distinct design categories for stability bars. Each approach presents unique structural characteristics for home gym environments.
Fixed-height handles offer maximum structural integrity and baseline stability. They feature zero mechanical wobble because they use solid, continuous steel tubing. They utilize fewer moving parts, which means fewer components fail over time. Fixed designs easily withstand aggressive pulling and pushing motions. However, this design proves highly unforgiving in practice. If the baseline height does not suit your specific stature, you simply cannot change it. Fixed bars are generally not scalable for households sharing the same equipment. A five-foot user and a six-foot user cannot share a fixed-height frame safely.
Adjustable-height models, including popular T-bars and U-bars, solve the multi-user sizing problem. They provide excellent customization for diverse workout styles. You can lower the bar for intense cardio sprints one day. You can raise it for balance-focused rehabilitation the next day. Yet, this versatility requires rigorous evaluation of the hardware. Knobs, cam-locks, and push-pins behave very differently under mechanical stress. Lower-tier models frequently suffer from excessive rattling. This annoying noise and structural movement compromises user confidence during high-intensity interval sessions. You must inspect the tightening mechanism closely.
Comparison Chart: Fixed vs. Adjustable Handlebar Frames
Feature | Fixed-Height Handle | Adjustable-Height Handle |
|---|---|---|
Structural Stability | Exceptional; zero mechanical wobble | Variable; relies entirely on locking pins |
Workout Versatility | Low; suited for single user profiles | High; adapts to multiple users easily |
Maintenance Needs | Minimal; no moving parts to tighten | Requires regular tightening of tension knobs |
Long-Term Durability | High resistance to vibration fatigue | Moderate; joints wear down over time |
Your specific fitness goals should dictate exactly where the stability bar sits. We break down the optimal physical placements based on common daily training regimens.
For physical rehabilitation and senior fitness, the primary focus remains on lateral balance. The target height should sit roughly at your belly button or slightly above your hip bone. This specific position provides an immediate proprioceptive anchor for the nervous system. It allows the user to maintain an upright, confident posture effortlessly. They feel totally secure without relying on the bar for heavy weight-bearing. The bar acts as a gentle guide rather than a crutch.
High-Intensity Interval Training (HIIT) and aggressive cardio demand a completely different setup. Set the target height slightly below your waist or at a standard resting hand level. This lower physical profile facilitates a ready athletic stance. You keep your knees deeply bent and your chest positioned forward. It ensures the metal frame does not obstruct high-knee lifts or dynamic lateral skate jumps. You retain full freedom of movement across the mat surface.
Barre workouts or upper-body integrated rebounding introduce complex isometric movements. The target height needs to reach your chest or lower ribcage. This taller setup comfortably accommodates aggressive pulling and pushing exercises. You often lean away from the frame during Barre routines. However, you must ensure the base is explicitly rated for lateral force. Tall bars create a long lever arm. This leverage can easily cause catastrophic tipping if the base lacks sufficient width or physical weight.
Any adjustable Fitness Trampoline handle will experience minor micro-movements during use. We call this the mechanical wobble factor. You must assess the reality of consumer-grade fitness equipment. Some slight movement is normal, but excessive, noisy rattling is dangerous. Evaluate whether the manufacturer uses reliable secondary stabilization hardware. Dual-threaded tension knobs mitigate this annoying issue far better than single spring-loaded pins.
Form deterioration represents another significant physiological risk. We often observe users gradually rely on the handle as muscular fatigue sets in. They lazily lean their upper body weight onto the steel frame. This transfers valuable kinetic energy away from the bungee or spring suspension system. You negate the celebrated low-impact benefit of the mat completely. Your wrists and shoulders absorb the shock instead of the bungees. Leaning heavily also shifts your center of gravity outward, risking a dangerous equipment tip-over.
Pay close attention to overall base integration. A handlebar remains only as secure as its specific attachment bracket. Handles attaching directly to a single folding leg present extreme failure risks.
Follow these specific structural guidelines to ensure optimal safety:
Avoid handles clamping onto thin, independent folding legs.
Prioritize models where the bracket integrates deeply into the main circular steel frame.
Check for thick, reinforced welding joints at the base connection points.
Ensure the mounting hardware utilizes nylon-insert locking nuts rather than vibrating wingnuts.
Smart purchasing requires looking past flashy marketing claims. Do not rely on vague product descriptions like "five-level adjustable." Look for the exact numerical minimum and maximum height measurements. You need the specific distance from the actual mat surface to the top of the grip. Measuring from the floor provides a falsely inflated height range.
Weight limit interactions also require careful, detailed scrutiny. Ensure the manufacturer clearly specifies a static weight limit for the mat alongside a separate structural limit for the handlebar. The handle exists strictly for balance assistance. It is never designed to support your full body weight during aggressive aerial maneuvers. Exceeding this secondary limit bends the main support post.
Consider the bar shape and grip material carefully. T-bars feature a single central vertical post. They feel less intrusive visually and allow more lateral foot clearance. U-bars use dual vertical posts connecting to the legs. They offer significantly higher structural stability but limit your sideways foot movement. In both design cases, require closed-cell foam or heavily textured rubber grips. Bare metal or cheap slick plastic creates immediate, dangerous slip hazards from hand sweat.
Finally, weigh foldability mechanisms against overall frame rigidity. If space-saving is a high priority in your apartment, verify the exact folding process. Check whether you must fully unbolt the handlebar with tools to fold the equipment. Quick-release mechanisms save valuable time. However, they may introduce slight frame instability if not cleaned and maintained properly over the years.
The optimal handlebar height is not a static number, but a dynamic variable linked directly to user height and workout intent. Balancing these elements ensures a safe, highly effective cardio routine.
Measure your standing waist height from the floor wearing your preferred workout shoes.
Subtract the estimated height of the trampoline legs from this initial measurement.
Use this newly calculated figure to cross-reference adjustable ranges when evaluating your product shortlists.
Always prioritize robust locking mechanisms and thick steel gauges over an unnecessarily extensive range of adjustability.
A: Yes, it accelerates the learning curve significantly. The bar provides a reliable physical anchor for lateral balance. Beginners can safely develop essential ankle stability, spatial awareness, and core control before they transition to hands-free bouncing routines.
A: Yes, it absolutely can. Placing excessive lateral or downward weight on the handle places immense mechanical stress on the mounting brackets. This action can warp the frame over time and dramatically increase the risk of the unit tipping forward during intense use.
A: For general cardiovascular fitness routines, the top of the grip should align comfortably between your hip bone and your belly button. You must measure this alignment while standing directly on the jumping mat, not on the floor next to the unit.
A: Generally, no. Frame curvature, leg spacing, and specific attachment brackets are highly proprietary to each manufacturer. Attempting to force a third-party handle onto a mismatched frame compromises structural integrity and introduces severe safety hazards.


